Raspberry Pi on Windows
Qemu on windows
install Qemu for windows
https://qemu.weilnetz.de/w64/ 下载打包好的windows安装包
下载的最新版本运行时提示api-ms-win-core-path-l1-1-0.dll错误!
网站上说从2022年开始的版本不支持windows7系统了,我的电脑还是2011年的win7系统
Raspberry Pi
内核
https://github.com/dhruvvyas90/qemu-rpi-kernel 提供了编译好的内核,RaspberryPi的最新版本是bulleye,所以下载其中的kernel-qemu-5.10.63-bullseye和versatile-pb-bullseye-5.10.63.dtb
https://github.com/dhruvvyas90/qemu-rpi-kernel/tree/master/native-emulation 给出了使用RaspBerryPi官方的image文件中提取内核的方法
https://github.com/dhruvvyas90/qemu-rpi-kernel/tree/master/tools 给出了自己编译内核的方法和配置脚本
系统镜像
https://www.raspberrypi.com/software/operating-systems/
由于下载的内核文件是5.10.63版本,所以系统镜像文件不能是最新版本,最好是匹配的版本。
https://downloads.raspberrypi.org/raspios_lite_armhf/release_notes.txt 版本说明中2021-10-30的版本更新使用的内核是Linux kernel 5.10.63,所以下载对应内核没有桌面的版本 Raspberry Pi OS Lite,而不是最新版本。
压缩包只有463M,解压出来的2021-10-30-raspios-bullseye-armhf-lite.img大小有1.8G
Run
windows上可以把命令写入批处理文件执行,不然太长了
1 | qemu-system-arm -M versatilepb -cpu arm1176 -m 256 -drive "file=2021-10-30-raspios-bullseye-armhf-lite.img,if=none,index=0,media=disk,format=raw,id=disk0" -device "virtio-blk-pci,drive=disk0,disable-modern=on,disable-legacy=off" -net "user,hostfwd=tcp::5022-:22,hostfwd=tcp::10000-:10000" -dtb versatile-pb-bullseye-5.10.63.dtb -kernel kernel-qemu-5.10.63-bullseye -serial stdio -net nic -append "root=/dev/vda2 panic=1" -no-reboot |
hostfwd=tcp::5022-:22表示将host上的5022端口转发到22端口上,即ssh连接的端口
登录用户名为pi,密码为raspberry

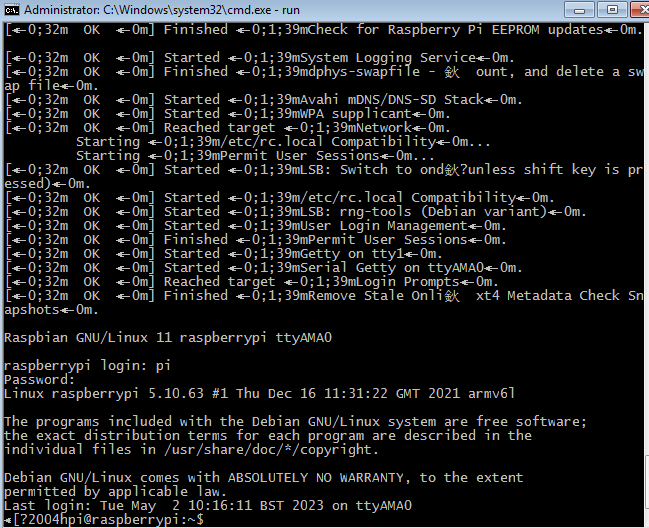
系统信息
1 | pi@raspberrypi:~ $ uname -a |
交叉编译
RaspiberryPi中的编译工具版本

编译工具
以前由Linaro维护的编译好的工具链现在都在arm的官网下载。
2022年之后的版本统一在一个页面下载
https://developer.arm.com/Tools%20and%20Software/GNU%20Toolchain
2022年之前的版本分为A-Profile GNU Toolchain for A-profile processors 和R-Profile and M-Profile GNU Arm Embedded Toolchain. 需要区分处理器类型分别下载。
A系列的地址 https://developer.arm.com/downloads/-/gnu-a
根据系统中现有的编译器版本为10.2.1,所以下载这个gcc-arm-10.2-2020.11-mingw-w64-i686-arm-none-linux-gnueabihf.tar.xz,这个版本下面的release note有说明内部使用的是哪些库版本。
安装配置
编译工具链包括Binutils,GCC和libc库,只需把下载好的编译工具链解压到D:\armgcc\gcc-arm-10.2-2020.11-mingw-w64-i686-arm-none-linux-gnueabihf,并把bin加入path环境变量D:\armgcc\gcc-arm-10.2-2020.11-mingw-w64-i686-arm-none-linux-gnueabihf\bin\,
编译测试程序
https://github.com/BrianSidebotham/arm-tutorial-rpi/blob/master/part-1/readme.md 有说明不同版本的RaspberryPi应该使用什么编译选项。
1 | arm-none-linux-gnueabihf-g++.exe -o test main.cpp -Ofast -mfpu=vfp -mfloat-abi=hard -march=armv6zk -mtune=arm1176jzf-s |
由于arm1176使用的是armv6架构,所以编译选项需要配置-march=armv6zk
- 如何查看CPU信息
cat /proc/cpuinfo
1 | pi@raspberrypi:~ $ cat /proc/cpuinfo |
但是编译器会报错
1 | arm-none-linux-gnueabihf\libc\usr\include\wchar.h:318:1: sorry, unimplemented: Thumb-1 hard-float VFP ABI |
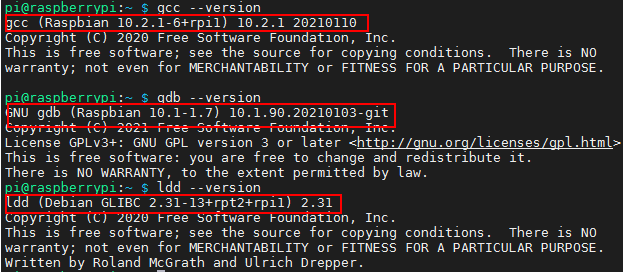
原因是arm官网提供的编译工具链是使用--with-arch=armv7-a的所以他支持的最低版本是armv7,不能是armv6,如果把编译选项改为armv7就没有问题了。但是模拟的cpu是armv6的,编译出来的成员在guest环境中运行时,会提示非法的指令,不能执行。以下分别是pi的系统内部gcc的版本信息和下载arm编译工具链的信息。
1 | pi@raspberrypi:~ $ gcc -v |
1 | Using built-in specs. |
编译问题解决
可以自己从头编译一套交叉工具链配置架构是armv6,造轮子的事情还是少做吧。
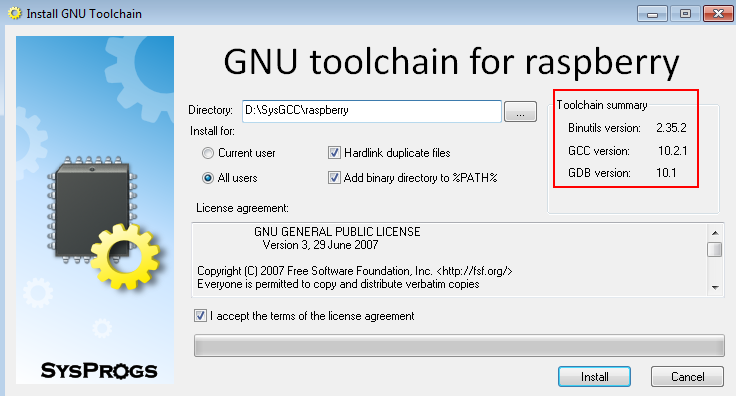
https://gnutoolchains.com/raspberry/ 这个网站提供了许多不同平台的windows预编译工具链
raspberry-gcc10.2.1.exe (588 MB) 这个版本和安装的RaspberryPi的版本一致,安装后的大小有5G,因为它把整个根文件系统搞下来了D:\SysGCC\raspberry\arm-linux-gnueabihf\sysroot\,而之前arm官方工具链只是libc目录只有300MB。

由于编译工具链的前缀和arm官方的不同,所以环境变量中把两个工具链的bin目录都配置上不冲突。
1 | arm-linux-gnueabihf-g++.exe -o test main.cpp -Ofast -mfpu=vfp -mfloat-abi=hard -march=armv6zk -mtune=arm1176jzf-s |
这次编译后没有任何错误信息,把文件通过sftp上传到RaspberryPi中,修改可执行权限也可以正常执行。
1 | pi@raspberrypi:~ $ chmod +x test |
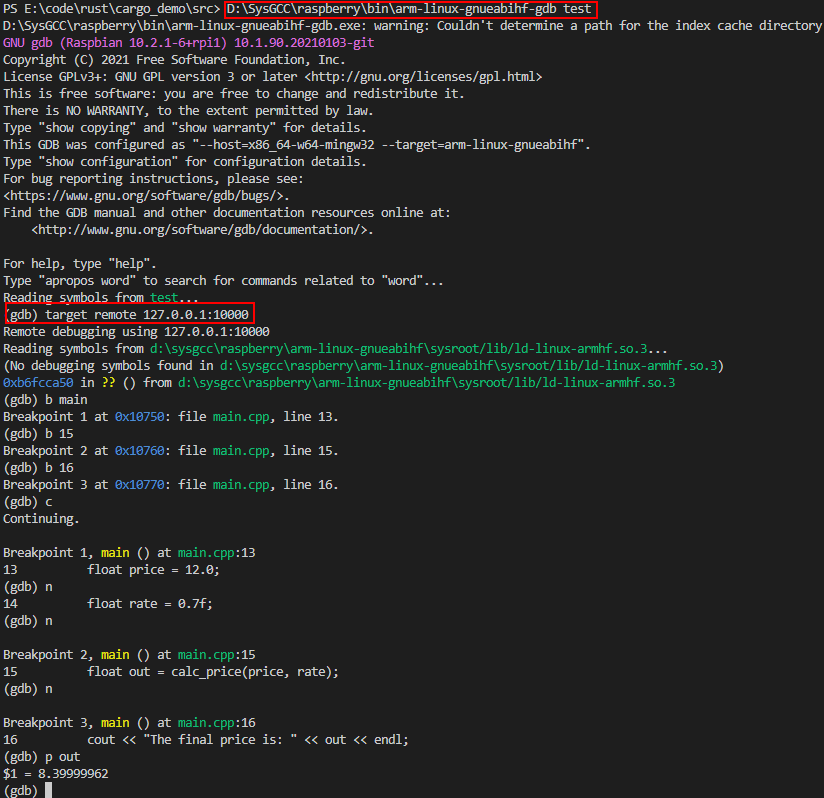
gdb调试
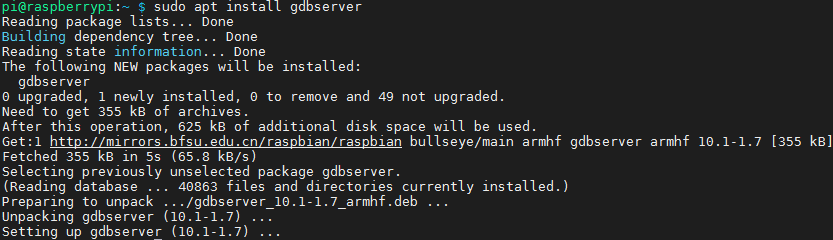
RaspberryPi安装gdbserver
sudo apt install gdbserver

系统启动增加gdbserver的端口映射,在ssh端口映射后增加10000端口映射,重新启动系统
1
-net "user,hostfwd=tcp::5022-:22,hostfwd=tcp::10000-:10000"
重新编译程序,去掉了编译优化选项,否则断点位置是错误的
1
arm-linux-gnueabihf-g++.exe -o test main.cpp -g -mfpu=vfp -mfloat-abi=hard -march=armv6zk -mtune=arm1176jzf-s
在RaspberryPi中执行
gdbserver :10000 test

在Host主机PC上执行
D:\SysGCC\raspberry\bin\arm-linux-gnueabihf-gdb test
source
1
2
3
4
5
6
7
8
9
10
11
12
13
14
15
16
17
18
19
using namespace std;
float calc_price(float org, float rate)
{
float out = org * rate;
return out;
}
int main()
{
float price = 12.0;
float rate = 0.7f;
float out = calc_price(price, rate);
cout << "The final price is: " << out << endl;
return 0;
}
问题
窗口黑屏不显示内容
https://github.com/dhruvvyas90/qemu-rpi-kernel/issues/141
新版的内核和镜像无法在qemu窗口中显示,会提示
Guest has not initialized the display的信息。所以只能通过-serial stdio把串口输出到标准控制台,进行基本的命令行操作。开启ssh服务
执行
sudo systemctl enable ssh和sudo systemctl start ssh
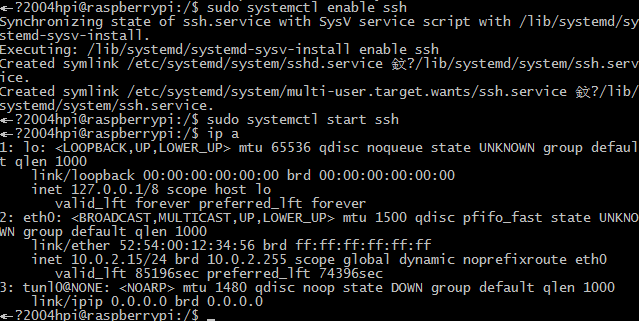
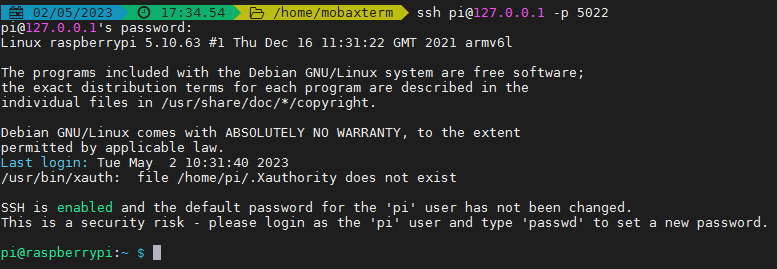
远程ssh登录到系统
ssh pi@127.0.0.1 -p 5022
有时候重启无法使用ssh连接上,可以在串口执行
systemctl status sshd查看服务运行状态- sftp连接,不清楚为什么ssh可以连接,sftp始终无法连接
最后通过执行sudo raspi-config,使用图形化界面再次打开ssh配置,目前测试只有使用这种方式打开的ssh可以使用sftp连接。
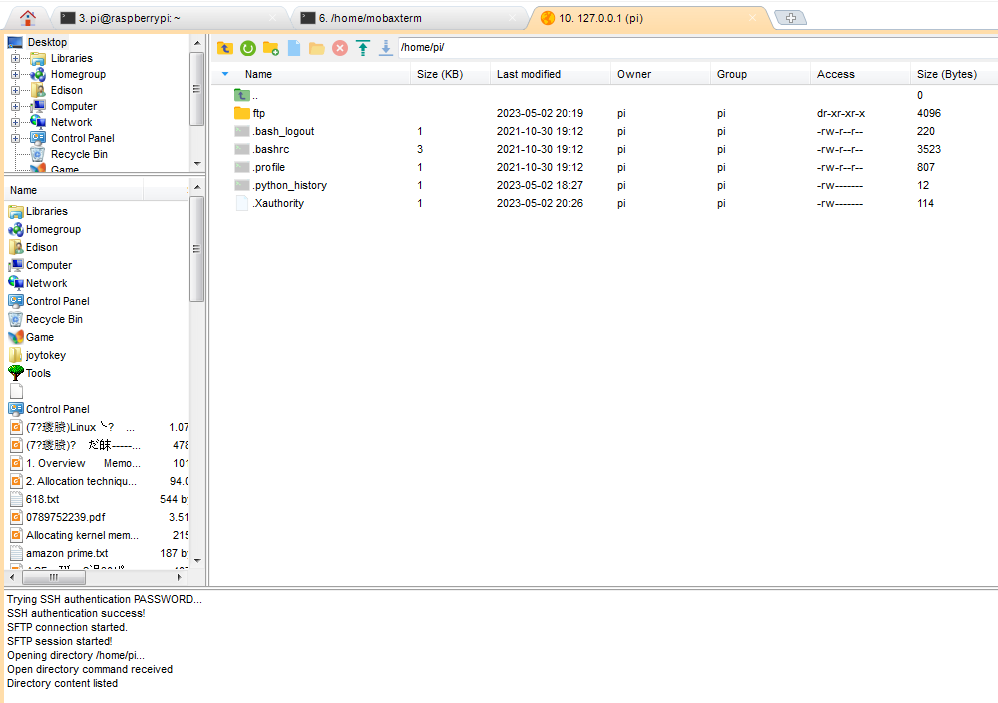
- sftp连接,不清楚为什么ssh可以连接,sftp始终无法连接
网络连接
qemu默认使用用户态的网络,限制了ICMP协议所以不能用ping命令,更新软件包还是可以的。
对于虚拟机,外部host都通过10.0.2.2访问自己。
完整的网络配置可以参考https://www.qemu.org/docs/master/system/devices/net.html 使用tap网卡的方式。